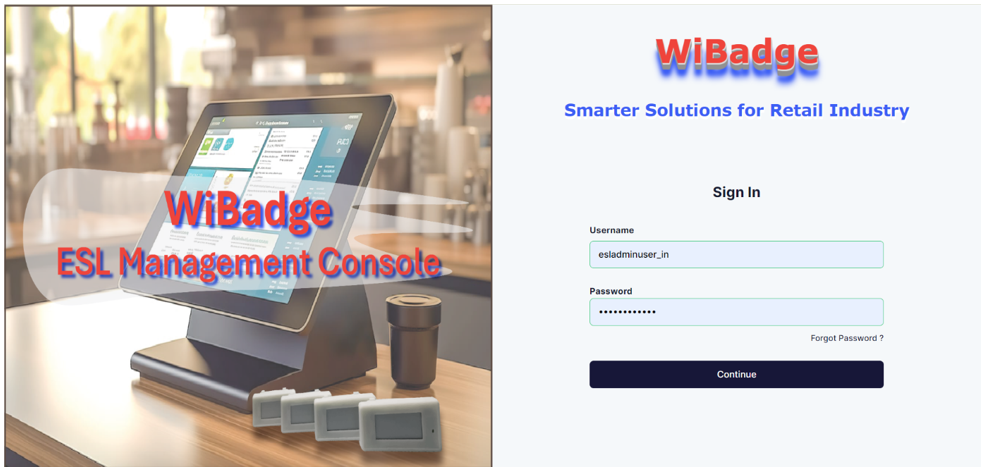
WiBadge ESL Management Console
The ESL WiBadge platform enables you to connect to the various Senstornet's Electronic Shelf Labels so that you can configure them individually, update them and, if necessary, synchronize them with your Point-of-Sale software.
Web application hosted on Cloud.
Dashboard UI to manage all connected Wibadge ESL & Gateway.
Real-time ESL remote content update.
"Find ESL" support
Secure sign-in.
API support to integrate with POS
Secure log in
Through the ESL WiBadge platform, you gain access to seamless connectivity with diverse electronic labels, facilitating personalized configuration, updates, and synchronization with your Point-of-Sale software. To commence, log in to your user area using the credentials provided by "Senstornet". Once logged in, you'll be equipped with robust tools for efficient configuration and management of your Electronic Shelf Labels.
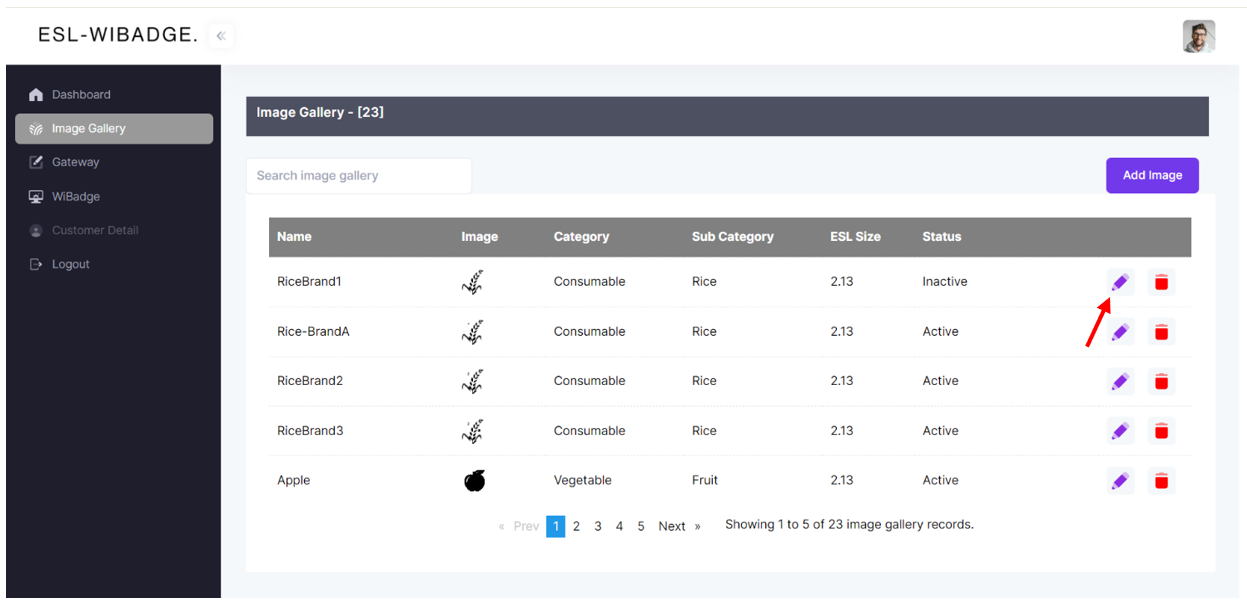
Seamless handling of product image, brand/store logo in the image gallery section
To add a new picture to the gallery, navigate to the image gallery section and look for the option to "Add image".
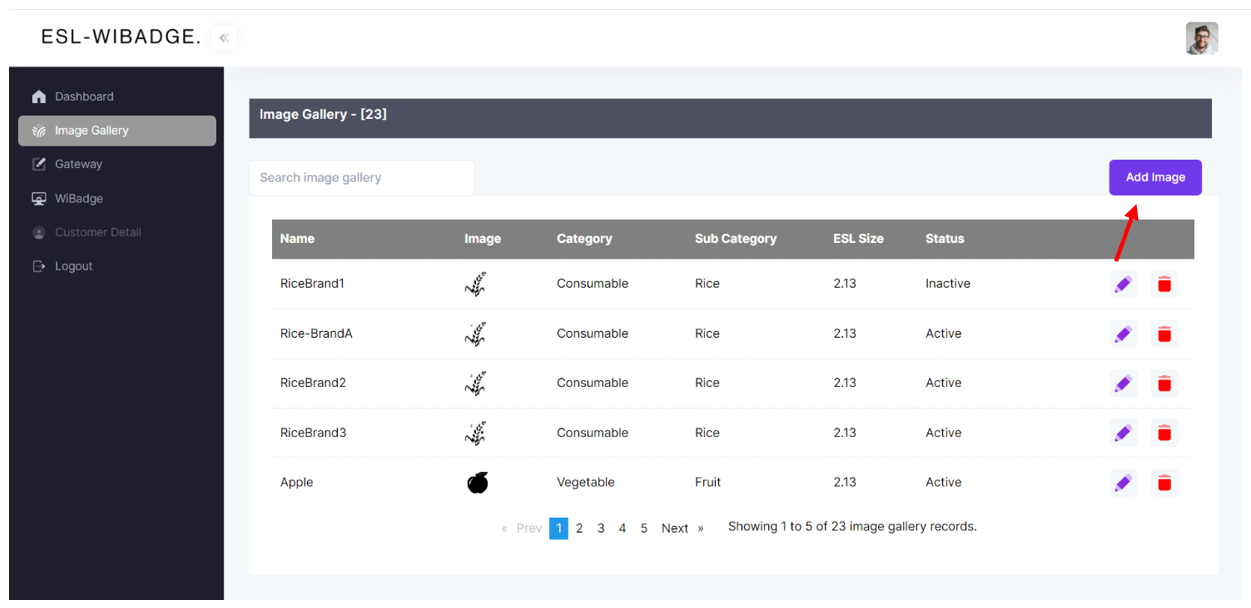
Once there, input essential details such as Name, Category, Sub Category, and ESL Size. After providing these details, select the image file from your device's storage. Once you've chosen the desired image, proceed to upload it to the gallery.
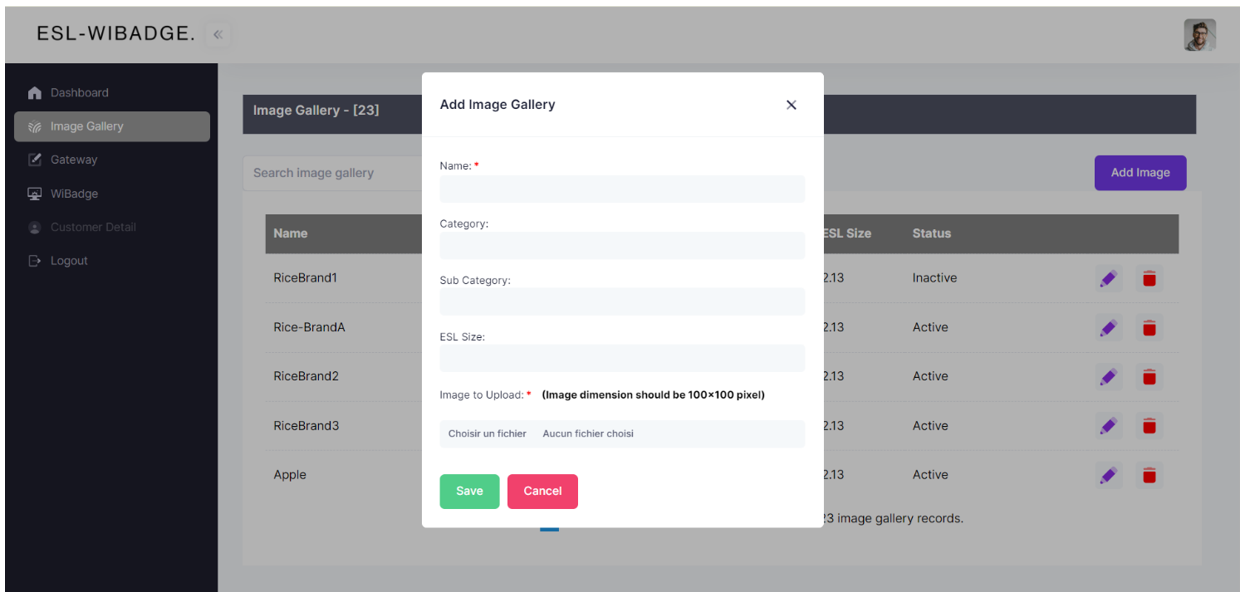
NOTE: When adding an image to the gallery, make sure to adhere to the prescribed dimensions. For instance, for a 2.13-inch display, add images with dimensions of 100x100 pixels.
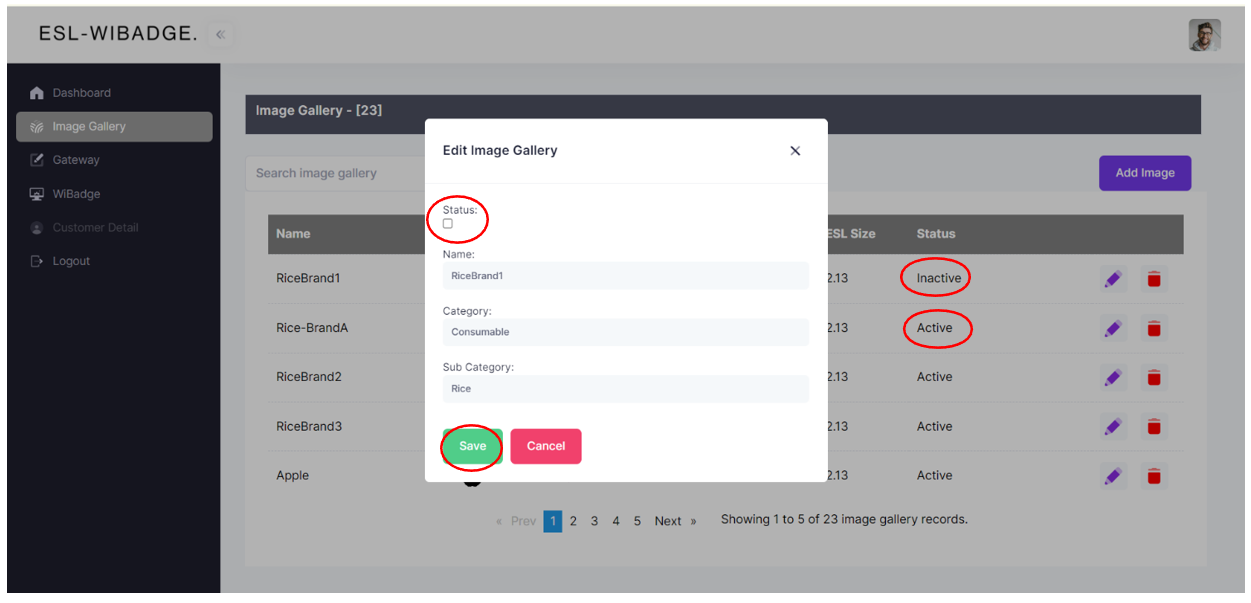
Confirm the addition by clicking on the 'Save' button. Your new picture will then be successfully added to the gallery for future use. Additionally, you have the option to choose the status of your image, whether to activate it or not.
User manageable WiBadge Gateway
In the WiBadge platform, you can utilize the Gateway section to seamlessly add a new gateway. By clicking on the 'Add Gateway' button, you'll input essential details such as the Gateway ID, Gateway name, Info Text, Type, and Config Info. Fields marked in red are mandatory.
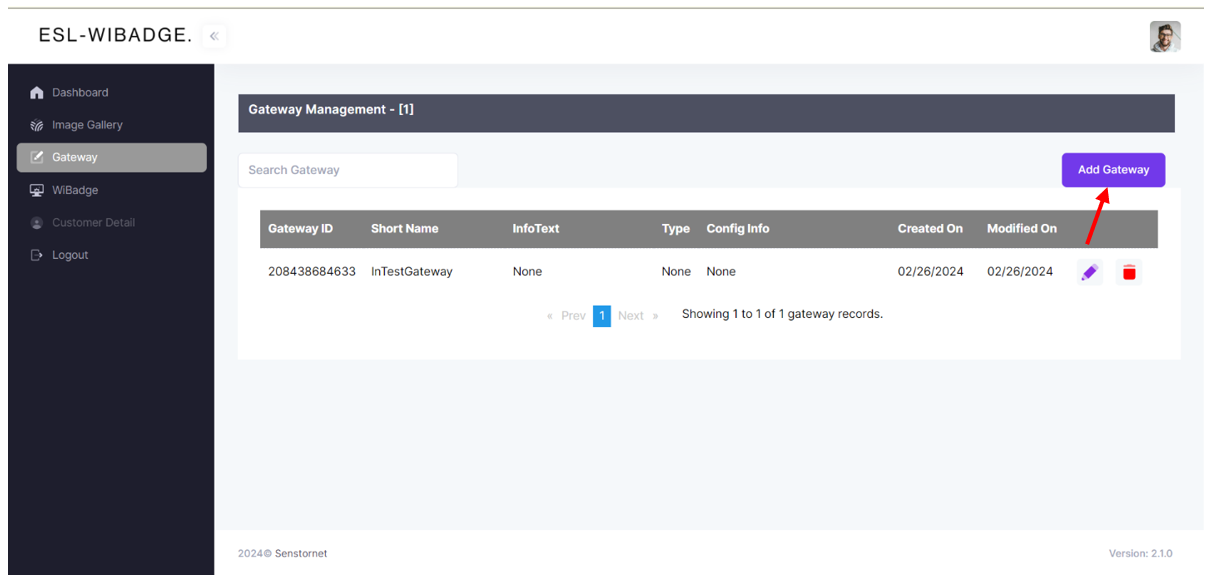
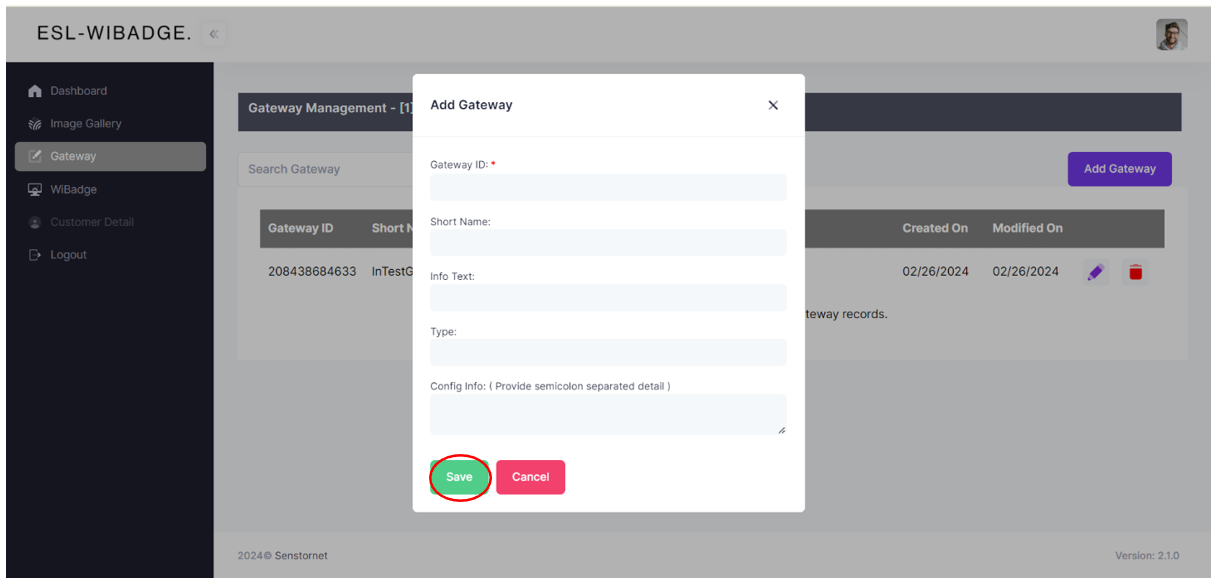
What's more, should you need to fine-tune any information after entry, the application grants you the flexibility to do so at any time using the convenient 'edit' button.


Once you've finalized all necessary modifications and ensured your gateway information is accurate, a simple click on the 'Save' button securely preserves your changes, ensuring smooth operation and system integrity.
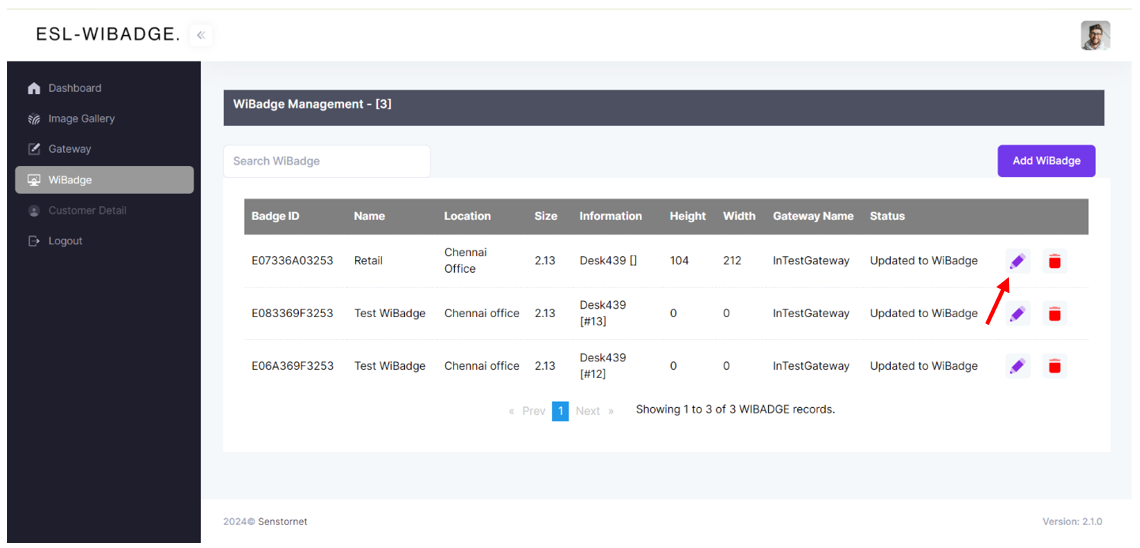
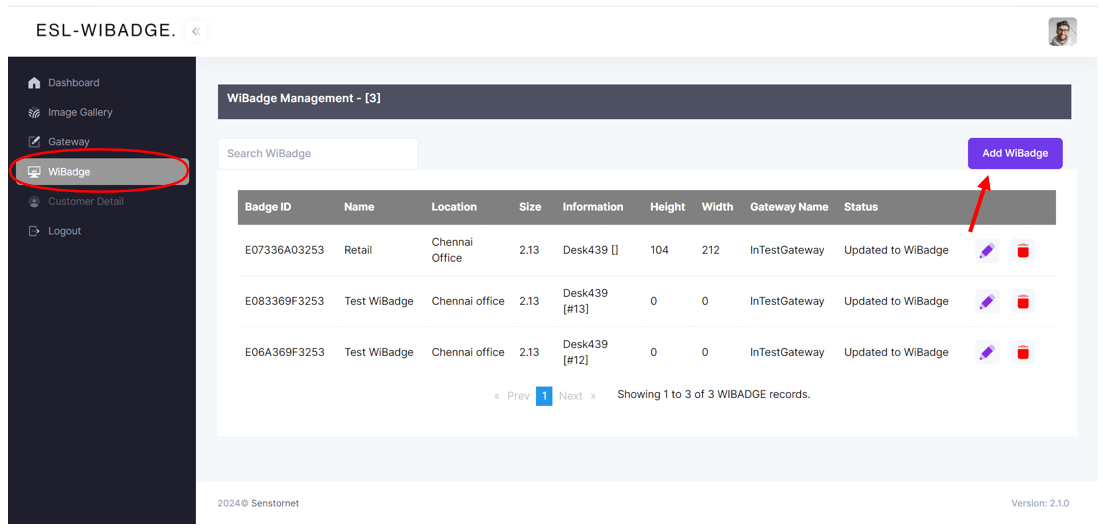
Simply add your new WiBadge ESL
In the WiBadge section, you can seamlessly add a new WiBadge by clicking on the 'Add WiBadge' button.
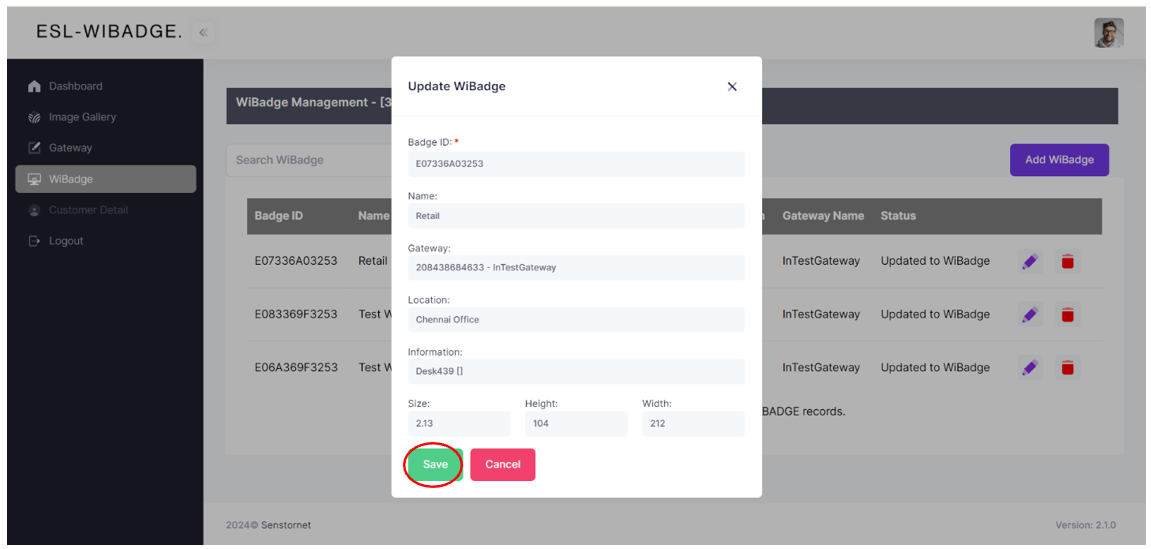
From there, you'll input essential details such as the Badge ID, Name, associated Gateway that you added in the Gateway section, Location, Information, as well as Size, Height, and Width. After inputting these details, simply click on the 'Save' button. Fields marked in red are mandatory.
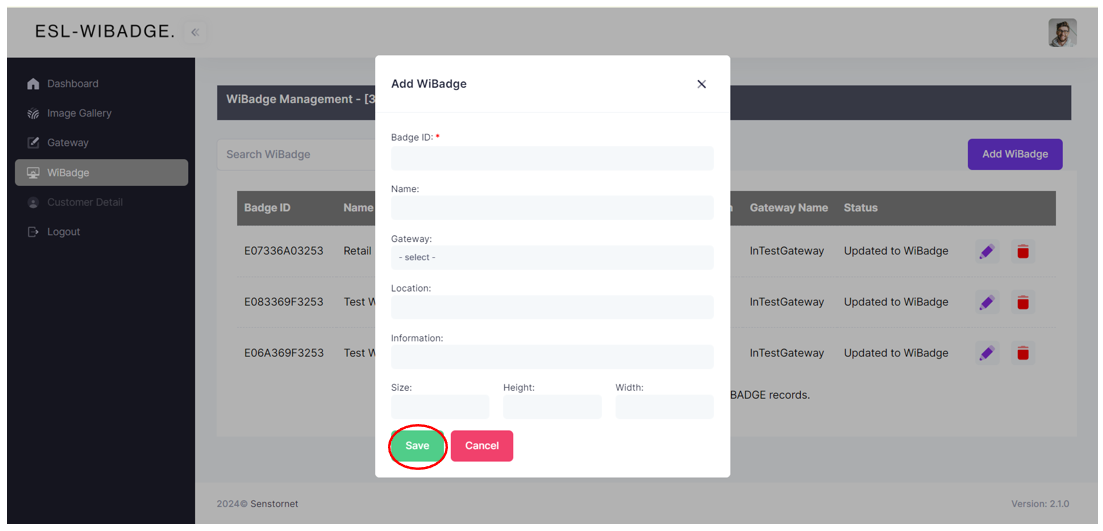
Additionally, if you need to fine-tune any information after entry, the platform grants you the flexibility to do so at any time using the convenient 'edit' button. Once you've finalized all necessary modifications and ensured your ESL information is accurate, a simple click on the 'Save' button securely preserves your changes, ensuring smooth operation and system integrity.